How To Use The "Special Events" Feature
The “Special Events” feature offers the ability to design and create event pages that can include guest registration and multiple ticket options. Event organizers can use this tool to create, manage, promote, download reports, and set up payment processing.
In the Special Events tab:
- Click “Active”, “Draft”, “Archived” or “My Events” depending on how you want your event to be displayed or not.
- Click “Search” to search specific Special Events by typing in a keyword.
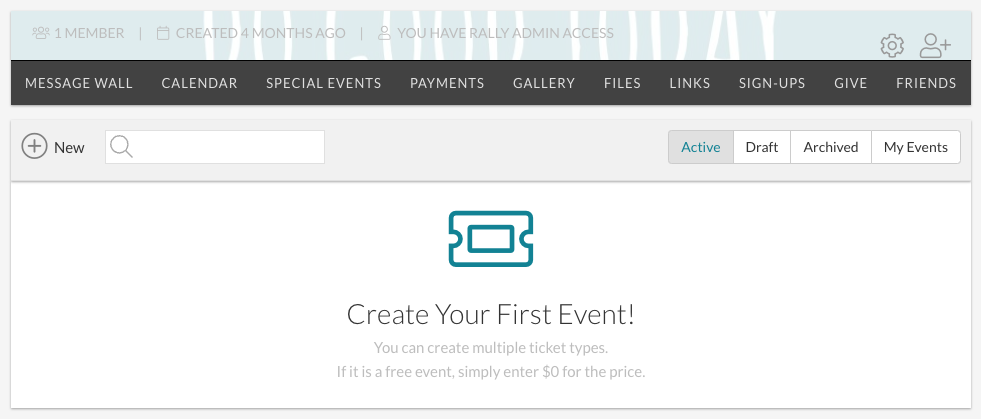
To Create a Special Event:
- Click “New” to create a new Special Event.
- Or, If there are no events yet displayed, you can also click the “Ticket” icon to initiate the create process.
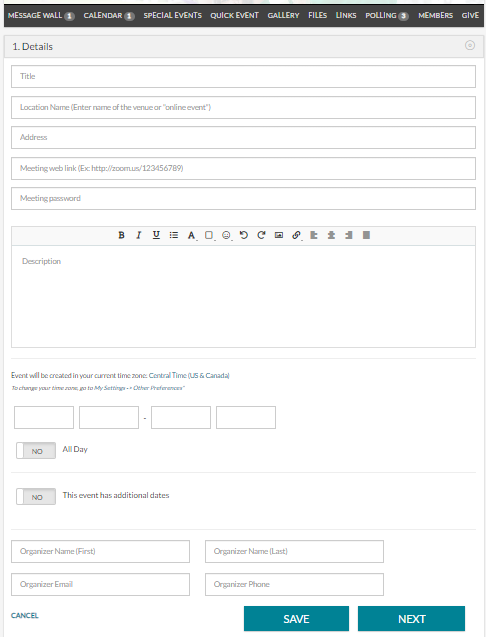
The “Details” section is where you will begin adding in the information:
- Event Title
- Event Location
- Address: Filling in the street address will generate a map view in the event
- Event Title
- Meeting Link for virtual events
- Description
- The description can be customized using the menu formatting options
- Start and End Date and Time or select All Day
- Event creators should note that events are created in the time zone of the user’s profile settings
- Set additional dates for recurring events by selecting “Yes”
- Event Organizer name and contact information
- Click “Save” to save the event in Draft mode
Click “Next” to proceed to the next section
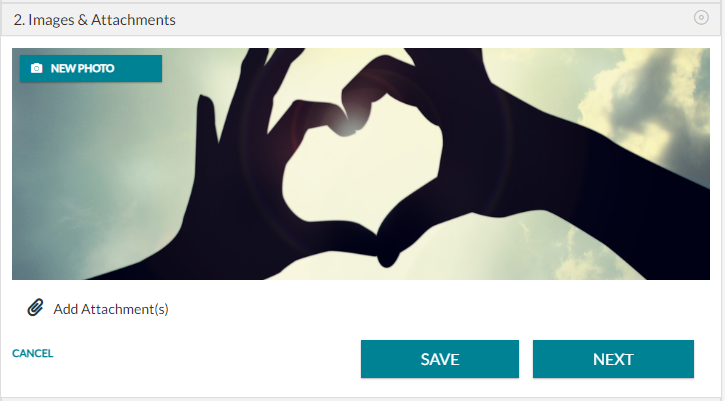
Click the “Images & Attachments” to add a banner image for the event and include file attachments.
- Click “New Photo” on the top left and select a photo or image from your computer for the event.
- Header image dimensions are 720-240 pixels or 10 x 3.3 inches.
- You can also click the “Paper Clip” icon to add any necessary documents that are relevant for your event.
- Click “Save” to save the event in Draft mode.
- Click “Next” to proceed to the next section.
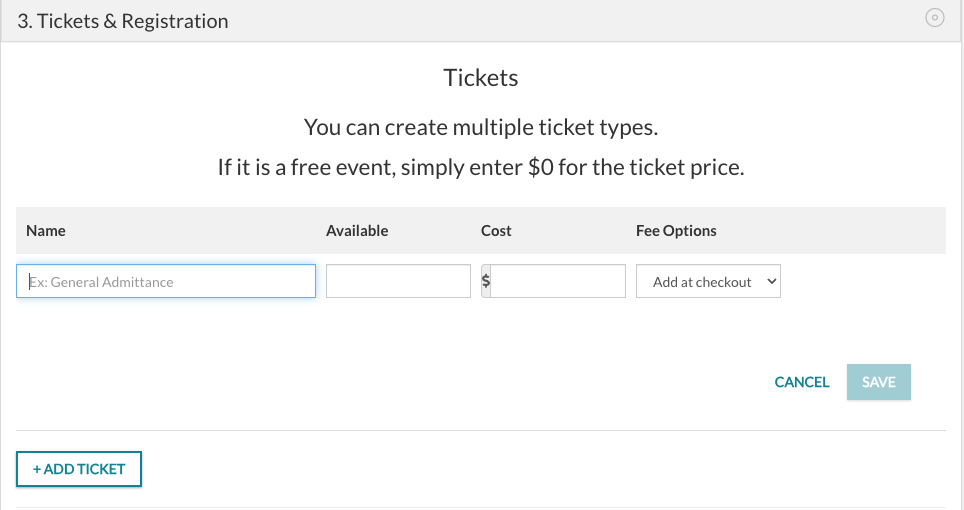
Click the “Tickets & Registration” button to add tickets of various types and pricing tiers.
-
Click “Add Ticket” to create a new ticket for the event.
Multiple ticket types can be added to the same event:
- Enter the ticket Name.
- Enter the number of tickets Available.
- Enter the Cost or price per ticket. Ticket price can be set to $0 if there is no cost.
- Select the Fee Options:
- Organizers have two options for how you want the fees to be paid:
- Option 1: “Add at checkout”
- This includes the fees as part of the ticket price that the buyer / payer would pay.
- Option 2: “Include in the ticket price”
- This includes the fees that the Organizer or Seller would pay.
- Option 1: “Add at checkout”
- Organizers have two options for how you want the fees to be paid:
- Rallyhood is integrated with the third-party application, Stripe, to manage the financial transaction process.*
Click “Save.”
- The Registration Form at check-out will collect the participants Name and Contact information.
- Organizers can also ask for additional information that might be necessary for a particular event.
- Simply fill out the field with any special instructions.
- If you have additional questions, or need to collect additional information, click “Add Additional Fields”
- There are up to 10 separate customizable fields to utilize.
Enter the Registration Deadline date, if applicable.
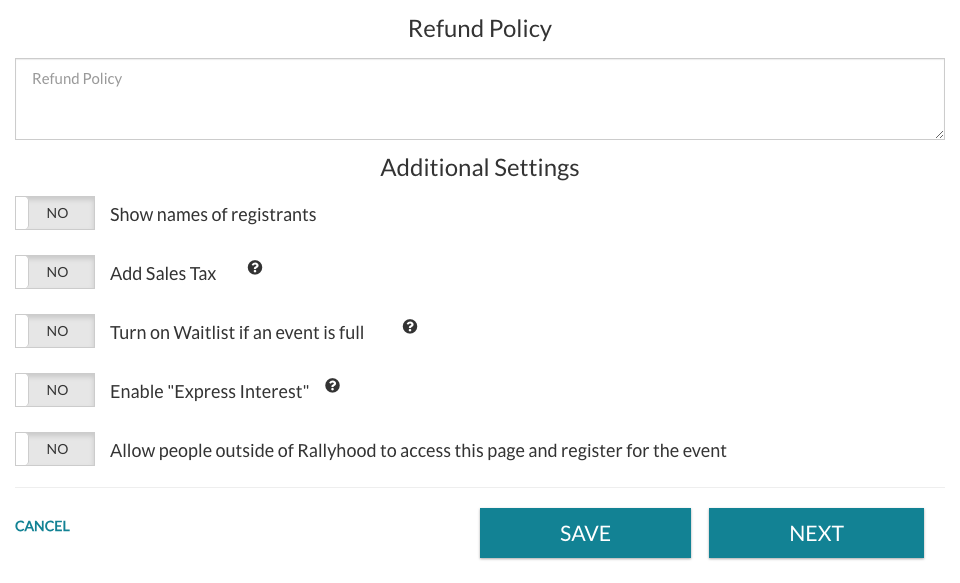
- You have the option to fill in the details for your Refund Policy.
- Set Additional Settings:
- Select “Yes” to show names of registrants or “No” to hide.
- Select “Yes” to Add Sales Tax, if applicable.
- Select “Yes” if you would like to turn on the “Waitlist” feature to gather names if the event is sold out.
- Select “Yes” to enable “Express Interest”. This option helps participates let the Organizer know they are interested but not ready to pay for the event. This also allows them to share a payment link to a Treasurer or Money Manager if that is relevant to the group.
- Select “Yes” to allow people outside of Rallyhood to access the Event Page and Register for the event.
- Public events will display shareable link above the Register button.
- Click “Save” to save the event in Draft mode.
- Click “Next” to proceed to the next section.
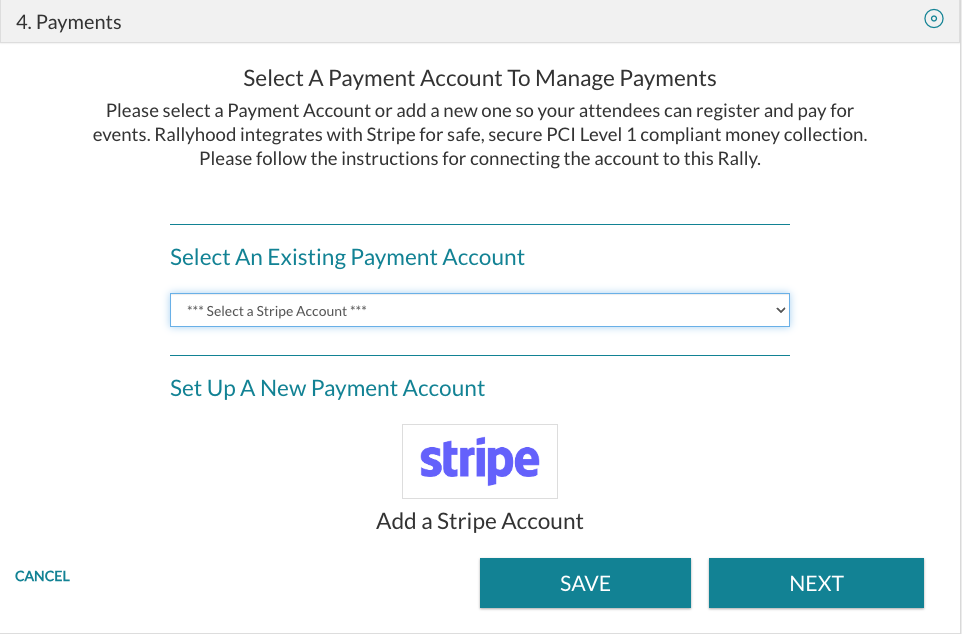
- Click “Payments” to add or create a Stripe Account for ticket payment processing.
- If the ticket price is free ($0), this step can be skipped to publish the event.
- If the tickets have a price, the event organizer will be prompted to select an existing stripe account or set up a new Stripe account.

- Click “Publish” to:
- Save the event as:
- Draft
- Active
- Archived
- Save the event as:
- Click “Delete” to delete the event.
- Click “Duplicate” to duplicate the event.
Special Events may also be accessed from the Calendar tab by clicking “Special Events.”
For additional information please refer to our How To Use "Special Events" tutorial video.